이 글은 Apple Human Interface Guidelines를 참고하여 작성하였습니다.
작성자 : 박진영
Accessing User Data
Clarifying Tracking Requests : 추적 요청 명확히 하기
App tracking is a sensitive issue. In some cases, it might make sense to display a custom screen that clearly describes the benefits of tracking.
Never precede the system-provided alert with a custom screen that could confuse or mislead people. People sometimes tap quickly to dismiss alerts without reading them. A custom messaging screen that takes advantage of such behaviors to influence choices will lead to rejection by App Store Review.
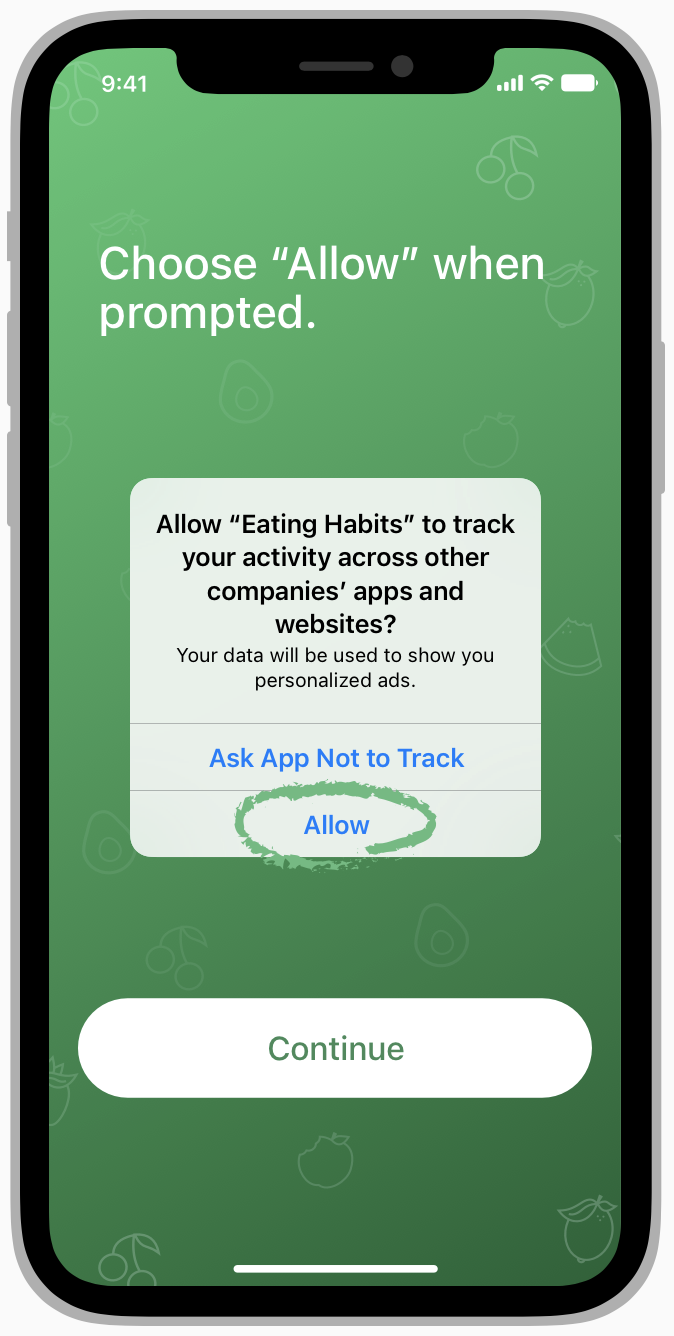
There are several prohibited custom-screen designs that will cause rejection. Some examples are offering incentives, displaying a screen that looks like a request, displaying an image of the alert, and annotating the screen behind the alert (shown below).
앱 추적은 민감한 문제입니다. 어떤 경우에는 추적의 이점을 명확하게 설명하는 사용자 정의 화면을 표시하는 것이 합리적일 수 있습니다.
절대 사람들을 혼란스럽게 하거나 오도할 수 있는 사용자 정의 화면으로 시스템 제공 경고를 시작하지 마십시오. 사람들은 때때로 알림을 읽지 않고 무시하기 위해 빠르게 탭합니다. 이러한 행동을 이용하여 선택에 영향을 미치는 맞춤형 메시지 화면은 App Store 검토에서 거부될 것입니다.
거부의 원인이 되는 몇 가지 금지된 사용자 지정 화면 디자인이 있습니다. 몇 가지 예는 인센티브 제공, 요청처럼 보이는 화면 표시, 경고 이미지 표시, 경고 뒤에 화면에 주석 달기입니다.
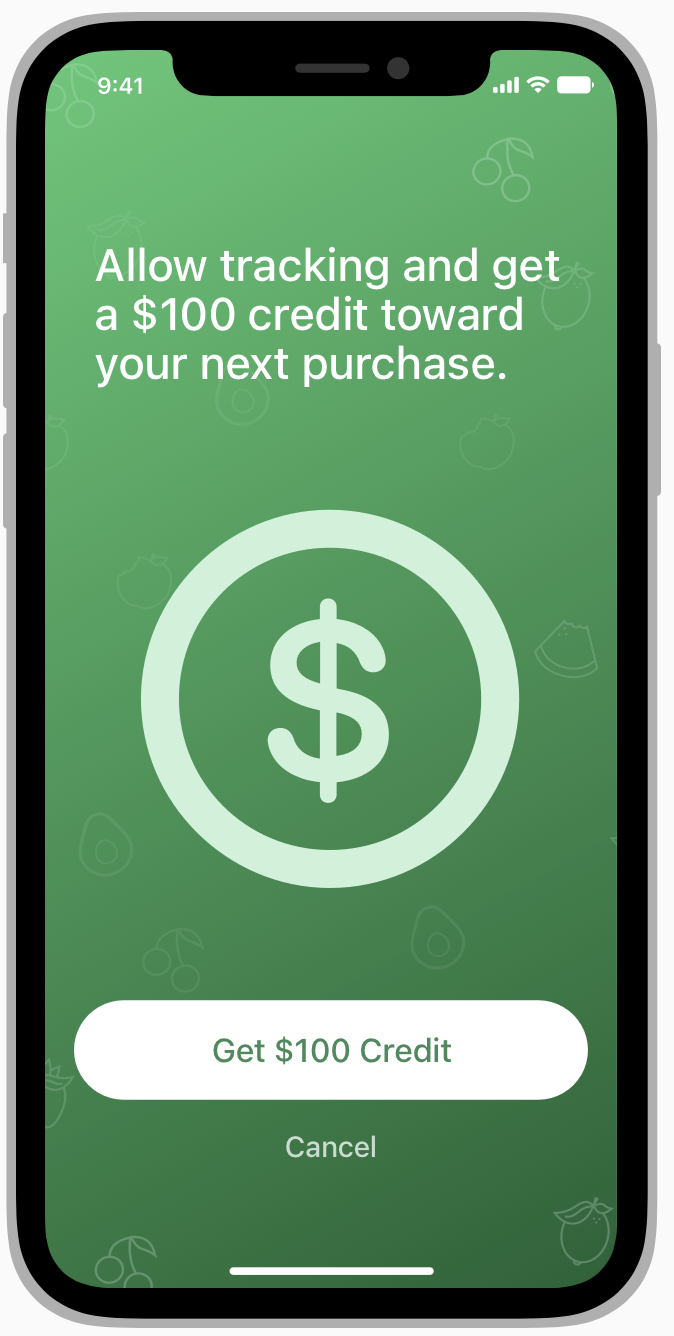
요청 승인에 대한 인센티브를 제공하지 마십시오. 권한 부여에 대해 사람들에게 보상을 제공할 수 없으며 사람들이 추적하도록 허용할 때까지 기능이나 콘텐츠를 보류하거나 앱을 사용할 수 없게 만들 수 없습니다.
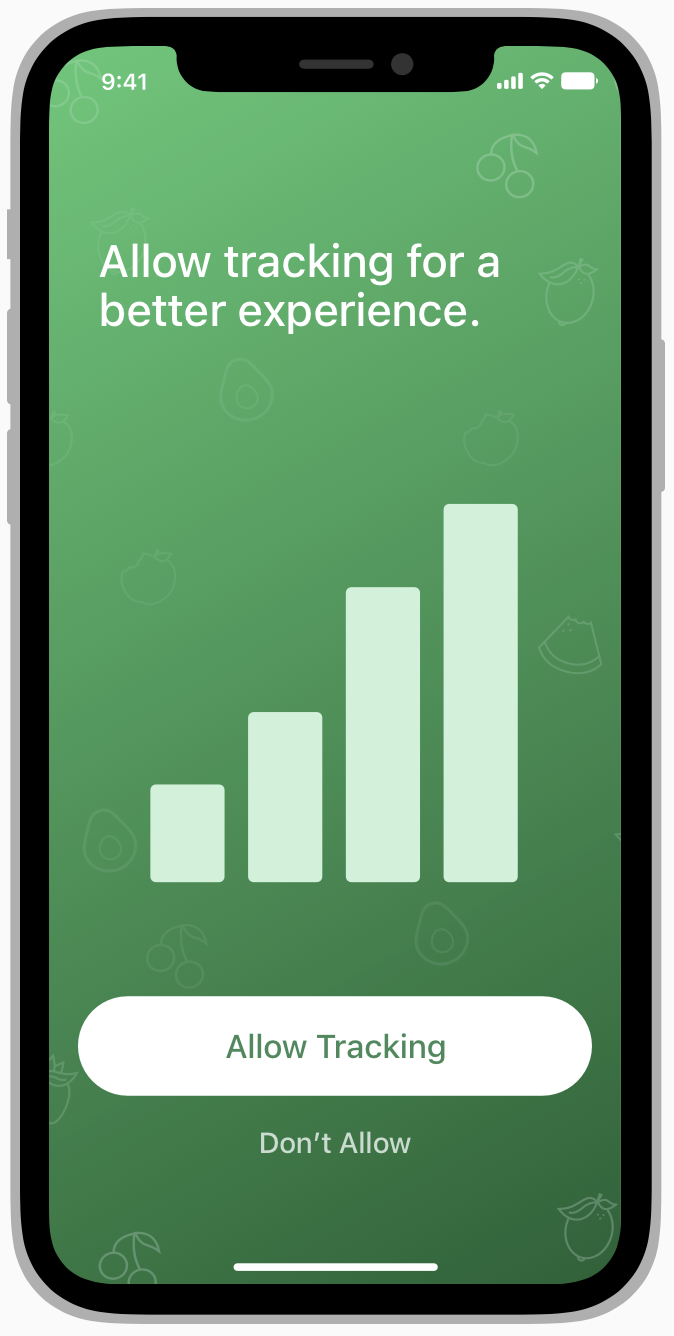
시스템 경고의 기능을 반영하는 사용자 지정 화면을 표시하지 마십시오. 특히 "허용" 또는 이와 유사한 용어를 사용하는 버튼 제목을 만들지 마십시오. 사람들이 사전 경고 화면에서 아무 것도 허용하지 않기 때문입니다.
표준 경고의 이미지를 표시하지 말고 어떤 식으로든 수정하십시오.
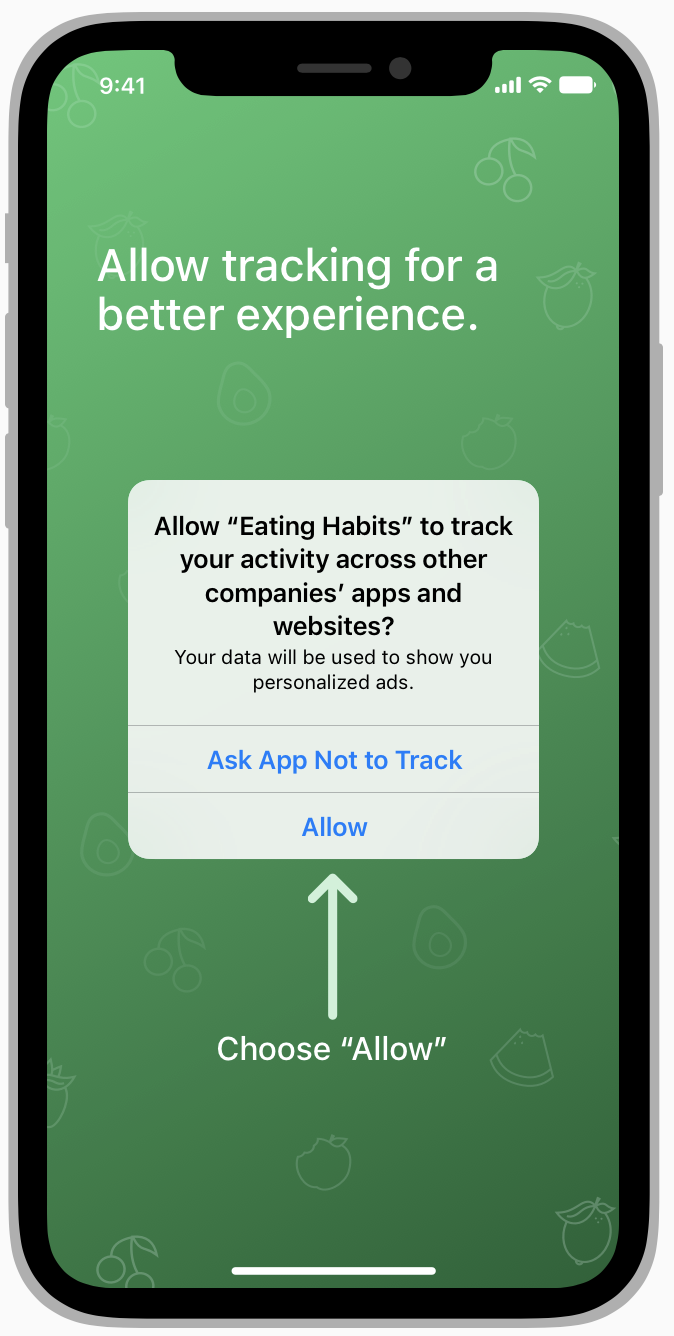
시스템 경고의 허용 버튼에 사람들의 주의를 끄는 시각적 신호를 그리지 마십시오.
Using the Location Button : 위치 버튼 사용하기
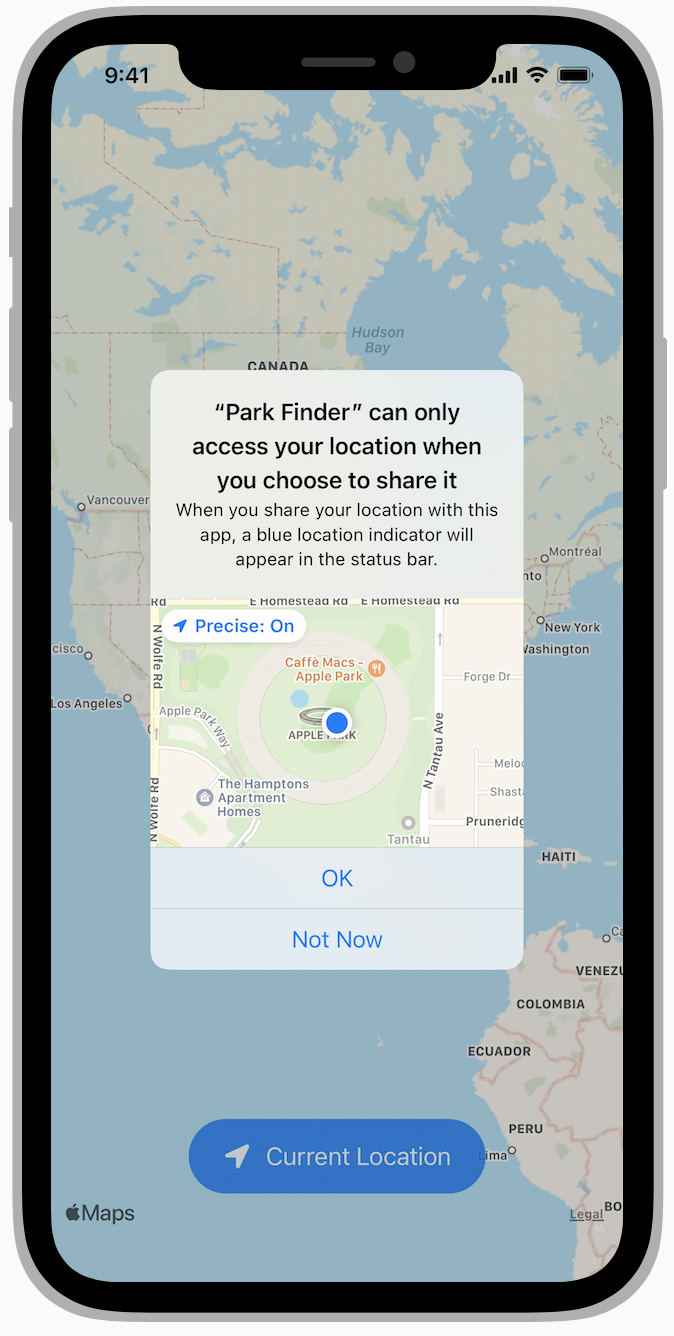
In iOS 15 and later, Core Location provides a button so people can grant your app temporary authorization to access their location at the moment a task needs it. Although a location button’s appearance can vary to match your app’s UI, it always communicates the action of location sharing in a way that’s instantly recognizable.

The location button grants your app temporary authorization to request the device location. If your app has no authorization status, tapping the location button has the same effect as when a person chooses Allow Once in the standard alert. If people previously chose While Using the App, tapping the location button doesn’t change your app’s status.
The first time people open your app and tap a location button, the system displays a standard alert. The alert helps people understand how using the button limits your app’s access to their location, and reminds them of the location indicator that appears when sharing starts.
iOS 15 이상에서, 핵심 위치는 버튼을 제공하여 사람들이 작업에 필요한 순간에 자신의 위치에 액세스할 수 있는 임시 권한을 앱에 부여할 수 있습니다. 위치 버튼의 모양은 앱의 UI와 일치하도록 다양할 수 있지만 항상 즉시 인식할 수 있는 방식으로 위치 공유 작업을 전달합니다.
위치 버튼은 앱에 기기 위치를 요청할 수 있는 임시 권한을 부여합니다. 앱에 승인 상태가 없는 경우 위치 버튼을 탭하면 표준 알림에서 한 번 허용을 선택할 때와 동일한 효과가 나타납니다. 사람들이 이전에 앱 사용 중을 선택한 경우 위치 버튼을 눌러도 앱 상태가 변경되지 않습니다.
사람들이 앱을 처음 열고 위치 버튼을 탭하면 시스템에 표준 알림이 표시됩니다. 알림은 사람들이 버튼을 사용하여 앱의 위치 액세스를 제한하는 방법을 이해하고 공유가 시작될 때 나타나는 위치 표시기를 상기시킵니다.
After people confirm their understanding of the button’s action, they simply tap the location button when they want to give your app one-time permission to access their location. Although each one-time authorization expires when people stop using your app, they don’t need to reconfirm their understanding of the button’s behavior.
Consider using the location button to give people a lightweight way to share their location for specific app features. For example, your app might help people attach their location to a message or post, find a store, or identify a building, plant, or animal they’ve encountered in their location. If you know that people often grant your app Allow Oncepermission, consider using the location button to help them benefit from sharing their location without having to interact with the alert.
사람들이 버튼의 동작에 대한 이해를 확인한 후 앱에 자신의 위치에 대한 액세스 권한을 한 번만 부여하고 싶을 때 위치 버튼을 탭하기만 하면 됩니다. 사람들이 앱 사용을 중단하면 각 일회성 승인이 만료되지만 버튼 동작에 대한 이해를 재확인할 필요는 없습니다.
위치 버튼을 사용하여 사람들이 특정 앱 기능에 대해 위치를 공유할 수 있는 간단한 방법을 제공하는 것을 고려하십시오. 예를 들어 앱은 사람들이 메시지나 게시물에 자신의 위치를 첨부하거나, 상점을 찾거나, 자신의 위치에서 만난 건물, 식물 또는 동물을 식별하는 데 도움이 될 수 있습니다. 사람들이 앱에 한 번 허용 권한을 자주 부여한다는 사실을 알고 있다면 위치 버튼을 사용하여 알림과 상호 작용할 필요 없이 위치를 공유할 수 있는 이점을 고려하십시오.
Consider customizing the location button to harmonize with your UI. Specifically, you can:
- Choose the system-provided title that works best with your feature, such as “Current Location” or “Share My Current Location”
- Choose the filled or outlined location glyph
- Select a background color and a color for the title and glyph
- Adjust the button’s corner radius
To help people recognize and trust location buttons, other visual attributes aren’t customizable. The system also ensures a location button remains legible by warning you about problems like low-contrast color combinations or too much translucency. In addition to fixing such problems, you’re responsible for making sure the text fits in the button — for example, button text should fit without truncation at all accessibility text sizes and when translated into other languages.
IMPORTANT
If the system identifies consistent problems with your customized location button, it won’t give your app access to the device location when people tap it. Although such a button can perform other app-specific actions, people may lose trust in your app if your location button doesn’t work as they expect.
당신의 UI와 조화를 이루도록 위치 버튼을 커스터 마이징 하는 것을 고려해보세요. 구체적으로 다음을 수행할 수 있습니다.
☑️ "현재 위치" 또는 "나의 현재 위치 공유"와 같이 기능에 가장 적합한 시스템 제공 제목을 선택하십시오.
☑️ 채워지거나 윤곽이 그려진 위치 글리프 선택
☑️ 제목과 글리프의 배경색과 색상을 선택합니다.
☑️ 버튼의 모서리 반경 조정
사람들이 위치 버튼을 인식하고 신뢰할 수 있도록 다른 시각적 속성은 사용자 지정할 수 없습니다. 또한 시스템은 대비가 낮은 색상 조합 또는 너무 많은 반투명도와 같은 문제에 대해 경고하여 위치 버튼을 읽기 쉬운 상태로 유지합니다. 이러한 문제를 수정하는 것 외에도 텍스트가 버튼에 맞는지 확인할 책임이 있습니다. 예를 들어 버튼 텍스트는 모든 접근성 텍스트 크기 및 다른 언어로 번역될 때 잘림 없이 맞아야 합니다.
중요
시스템이 사용자 정의된 위치 버튼과 관련된 일관된 문제를 식별하는 경우 사람들이 탭할 때 앱에 장치 위치에 대한 액세스 권한을 부여하지 않습니다. 이러한 버튼은 다른 앱별 작업을 수행할 수 있지만 위치 버튼이 예상대로 작동하지 않으면 사람들이 앱에 대한 신뢰를 잃을 수 있습니다.
Using the Microphone in a Shazamkit App : ShazamKit 앱에서 마이크 사용하기
ShazamKit enables audio recognition by matching an audio sample against the ShazamKit catalog or a custom audio catalog. In iOS 15 and later, apps can use ShazamKit to enable features like:
- Enhancing app experiences with graphics that correspond with the genre of currently playing music
- Making media content accessible to people with hearing disabilities by providing closed captions or sign language that syncs with the audio
- Synchronizing in-app experiences with virtual content in contexts like online learning and retail
If you need the device microphone to get audio samples for your app to recognize, you must request access to it. As with all types of permission requests, it’s important to help people understand why you’re asking for access;
ShazamKit은 오디오 샘플을 ShazamKit 카탈로그 또는 사용자 지정 오디오 카탈로그와 일치시켜 오디오 인식을 가능하게 합니다. iOS 15 이상에서 앱은 ShazamKit을 사용하여 다음과 같은 기능을 활성화할 수 있습니다.
☑️ 현재 재생 중인 음악 장르에 맞는 그래픽으로 앱 경험 향상
☑️ 오디오와 동기화되는 자막 또는 수화를 제공하여 청각 장애가 있는 사람들이 미디어 콘텐츠에 액세스할 수 있도록 합니다.
☑️ 온라인 학습 및 소매와 같은 맥락에서 가상 콘텐츠와 인앱 경험 동기화
앱이 인식할 오디오 샘플을 가져오기 위해 장치 마이크가 필요한 경우 액세스 권한을 요청해야 합니다. 모든 유형의 권한 요청과 마찬가지로 사용자가 액세스 권한을 요청하는 이유를 이해하도록 돕는 것이 중요합니다.
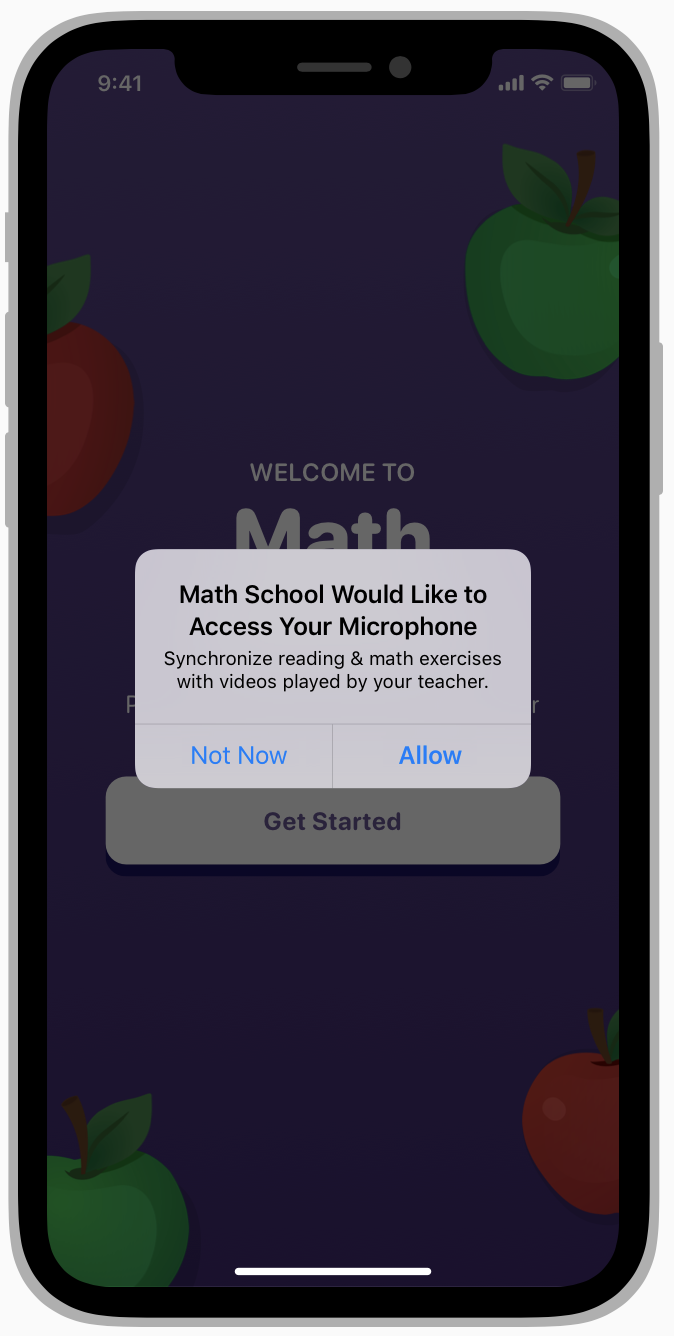
After you receive permission to access the microphone for features that have ShazamKit enabled, follow these guidelines.
Stop recording as soon as possible. When people allow your app to record audio for recognition, they don’t expect the microphone to stay on. To help preserve privacy, only record for as long as it takes to get the sample you need.
Let people opt in to storing your app’s recognized songs to their iCloud library. If your app can store recognized songs to iCloud, give people a way to first approve this action. Even though both the Music Recognition control and the Shazam app show your app as the source of the recognized song, people appreciate having control over which apps can store content in their library.
ShazamKit이 활성화된 기능에 대한 마이크 액세스 권한을 받은 후 다음 지침을 따르세요.
가능한 한 빨리 녹음을 중지하십시오. 사람들이 앱이 인식을 위해 오디오를 녹음하도록 허용할 때 마이크가 켜져 있을 것이라고 기대하지 않습니다. 개인 정보를 보호하기 위해 필요한 샘플을 얻는 데 걸리는 시간 동안만 기록하십시오.
사람들이 앱에서 인식한 노래를 iCloud 보관함에 저장하도록 선택합니다. 앱이 인식된 노래를 iCloud에 저장할 수 있는 경우 사람들에게 먼저 이 작업을 승인할 수 있는 방법을 제공하십시오. 음악 인식 컨트롤과 Shazam 앱 모두 앱을 인식된 노래의 소스로 표시하지만 사람들은 라이브러리에 콘텐츠를 저장할 수 있는 앱을 높이 평가합니다.
'GDSC HUFS 3기 > iOS - App Architecture' 카테고리의 다른 글
| [AHIG] App Architecture - Settings (0) | 2022.05.15 |
|---|---|
| [AHIG] App Architecture - Accessing User Data (1/2) (0) | 2022.05.13 |
| [AHIG] App Architecture - Navigation (0) | 2022.05.12 |
| [AHIG] App Architecture - Loading, Modality (0) | 2022.05.05 |
| [AHIG] App Architecture - Launching, Onboarding (0) | 2022.05.03 |