이 글은 이것이 안드로이드다 with 코틀린(개정판)를 참고하여 작성하였습니다.
작성자 : 서다원
개발환경은 Windows, Android Studio입니다.
126-131강의 내용입니다.
권한 요청 데모
예를 들어 앱에서 카메라나 위치를 사용할 수 있게 허가를 요청하는 것이다.
<?xml version="1.0" encoding="utf-8"?>
<manifest xmlns:android="http://schemas.android.com/apk/res/android"
    package="eu.tutorials.permissiondemo">
<uses-permission android:name="android.permission.CAMERA"/>
    <uses-permission android:name="android.permission.ACCESS_COARSE_LOCATION"/>
    <uses-permission android:name="android.permission.ACCESS_FINE_LOCATION"/>
    <application
        android:allowBackup="true"
        android:icon="@mipmap/ic_launcher"
        android:label="@string/app_name"
        android:roundIcon="@mipmap/ic_launcher_round"
        android:supportsRtl="true"
        android:theme="@style/Theme.PermissionDemo">
        <activity
            android:name=".MainActivity"
            android:exported="true">
            <intent-filter>
                <action android:name="android.intent.action.MAIN" />

                <category android:name="android.intent.category.LAUNCHER" />
            </intent-filter>
        </activity>
    </application>

</manifest>
Manifest 에 카메라 앱을 얻기위한 구문, 카메라 앱을 이용하기 위한 구문을 추가해주자
package eu.tutorials.permissiondemo

import android.Manifest
import android.content.pm.PackageManager
import android.os.Build
import androidx.appcompat.app.AppCompatActivity
import android.os.Bundle
import android.util.Log
import android.widget.Button
import android.widget.Toast
import androidx.activity.result.ActivityResultLauncher
import androidx.activity.result.contract.ActivityResultContracts
import androidx.appcompat.app.AlertDialog
import androidx.core.content.ContextCompat

class MainActivity : AppCompatActivity() {


    //Todo 1: This time we creat the Activity result launcher of type Array<String>
    private val cameraAndLocationResultLauncher:ActivityResultLauncher<Array<String>> =
        registerForActivityResult(
            ActivityResultContracts.RequestMultiplePermissions()
        ){permissions->
            /**
            Here it returns a Map of permission name as key with boolean as value
            Todo 2: We loop through the map to get the value we need which is the boolean
            value
             */
               Log.d("MainActivity","Permissions $permissions")
                permissions.entries.forEach {
                    val permissionName = it.key
                    //Todo 3: if it is granted then we show its granted
                    val isGranted = it.value
                    if (isGranted) {
                        //check the permission name and perform the specific operation
                        if ( permissionName == Manifest.permission.ACCESS_FINE_LOCATION) {
                            Toast.makeText(
                                this,
                                "Permission granted for location",
                                Toast.LENGTH_LONG
                            )
                                .show()
                        }else{
                            //check the permission name and perform the specific operation
                            Toast.makeText(
                                this,
                                "Permission granted for Camera",
                                Toast.LENGTH_LONG
                            )
                                .show()
                        }
                    } else {
                        if ( permissionName == Manifest.permission.ACCESS_FINE_LOCATION) {
                            Toast.makeText(
                                this,
                                "Permission denied for location",
                                Toast.LENGTH_LONG
                            )
                                .show()
                        }else{
                            Toast.makeText(
                                this,
                                "Permission denied for Camera",
                                Toast.LENGTH_LONG
                            )
                                .show()
                        }
                    }
                }
        }

    override fun onCreate(savedInstanceState: Bundle?) {
        super.onCreate(savedInstanceState)
        setContentView(R.layout.activity_main)

        val btnCameraPermission: Button = findViewById(R.id.btnCameraPermission)

        btnCameraPermission.setOnClickListener {
            if (Build.VERSION.SDK_INT >= Build.VERSION_CODES.M && shouldShowRequestPermissionRationale(
                    Manifest.permission.CAMERA
                )
            ) {
               showRationaleDialog(" Permission Demo requires camera access",
                   "Camera cannot be used because Camera access is denied")
            } else {
                // You can directly ask for the permission.
                // The registered ActivityResultCallback gets the result of this request.
                cameraAndLocationResultLauncher.launch(
                    arrayOf(Manifest.permission.CAMERA,Manifest.permission.ACCESS_FINE_LOCATION)
                )

            }
        }

    }

    /**
     * Shows rationale dialog for displaying why the app needs permission
     * Only shown if the user has denied the permission request previously
     */
    private fun showRationaleDialog(
        title: String,
        message: String,
    ) {
        val builder: AlertDialog.Builder = AlertDialog.Builder(this)
        builder.setTitle(title)
            .setMessage(message)
            .setPositiveButton("Cancel") { dialog, _ ->
                dialog.dismiss()
            }
        builder.create().show()
    }

}
버튼을 하나 만들어서 버튼을 눌렀을 때 카메라 권한을 특정해 요청하도록 한다.
앱을 실행해서 버튼을 누르면 승인 요청이 뜬다.
이제 카메라 기능을 사용해서 결과를 위한 액티비티를 가져오고 사용자가 찍은 이미지를 가져올 수 있게 되는데,
다른 권한도 사용하기 위해선 ActivityResultContracts.RequestMultiplePermissions() 를 사용할 수 있다.
permission 을 기준으로 forEach 문법을 사용해서 어떤 권한을 승인했는지 하나하나 확인한다.
커스텀 다이얼로그 데모
두 종류의 다이얼로그를 작성해보자
일단 스낵바이다
토스트와 다른 점이 있다면?
- 스낵바는 앱의 액티비티에서만 보인다.
- 토스트는 사용가 입력값을 사용한 실행이 불가능하지만 스낵바는 설정이 가능하다
- 스낵바는 스와이프가 가능하다.
- 스낵바는 경고 메세지나 주의사항 메시지로 활용하기 좋다.
 imageButton.setOnClickListener { view ->
                Snackbar.make(view, "You have clicked image button.", Snackbar.LENGTH_LONG).show()
일단 view 에 입력하고
표시할 텍스트를 적고
스낵바를 표시할 시간을 지정한다.
두번째로 알아볼 건 alert 이다.
텍스트가 아이콘과 함께 표시되고 앱의 경고메세지를 표시한다.
종료시키거나 예 아니오 등을 클릭할 수 있다.
 val btnAlertDialog: Button = findViewById(R.id.btn_alert_dialog)
            btnAlertDialog.setOnClickListener { view ->

                //Launch Alert Dialog
                alertDialogFunction()
            }


            ...


  /**
     * Method is used to show the Alert Dialog.
     */
    private fun alertDialogFunction() {
        val builder = AlertDialog.Builder(this)
        //set title for alert dialog
        builder.setTitle("Alert")
        //set message for alert dialog
        builder.setMessage("This is Alert Dialog. Which is used to show alerts in our app.")
        builder.setIcon(android.R.drawable.ic_dialog_alert)

        //performing positive action
        builder.setPositiveButton("Yes") { dialogInterface, which ->
            Toast.makeText(applicationContext, "clicked yes", Toast.LENGTH_LONG).show()
            dialogInterface.dismiss() // Dialog will be dismissed
        }
        //performing cancel action
        builder.setNeutralButton("Cancel") { dialogInterface, which ->
            Toast.makeText(
                applicationContext,
                "clicked cancel\n operation cancel",
                Toast.LENGTH_LONG
            ).show()
            dialogInterface.dismiss() // Dialog will be dismissed
        }
        //performing negative action
        builder.setNegativeButton("No") { dialogInterface, which ->
            Toast.makeText(applicationContext, "clicked No", Toast.LENGTH_LONG).show()
            dialogInterface.dismiss() // Dialog will be dismissed
        }
        // Create the AlertDialog
        val alertDialog: AlertDialog = builder.create()
        // Set other dialog properties
        alertDialog.setCancelable(false) // Will not allow user to cancel after clicking on remaining screen area.
        alertDialog.show()  // show the dialog to UI
    }
}
따로 alertDialog 함수를 만들었다.
builder 클래스로 dialog 를 간편하게 만들고, context를 이용해 실행할 상황을 this 로 설정한다.
그리고 나서 builder 제목을 정하고, 표시할 builder 메시지와 아이콘을 설정한다.
setPositiveButton 은 yes 버튼을 의미하는데 눌렀을 때 어떤 코드를 실행할지 적을 수 있다.
위 코드에서는 토스트를 뜨게하고 dismiss() 함수로 dialog 를 종료한다.
반대로 setNeutralButton 은 Cancel 기능을 구현할 수 있다.
custom dialog 를 만들어 사용할 수도 있다.
 private fun customDialogFunction() {
        val customDialog = Dialog(this)
        /*Set the screen content from a layout resource.
    The resource will be inflated, adding all top-level views to the screen.*/
        customDialog.setContentView(R.layout.dialog_custom)
        customDialog.findViewById<TextView>(R.id.tv_submit).setOnClickListener {
            Toast.makeText(applicationContext, "clicked submit", Toast.LENGTH_LONG).show()
            customDialog.dismiss() // Dialog will be dismissed
        }
        customDialog.findViewById<TextView>(R.id.tv_cancel).setOnClickListener {
            Toast.makeText(applicationContext, "clicked cancel", Toast.LENGTH_LONG).show()
            customDialog.dismiss()
        }
        //Start the dialog and display it on screen.
        customDialog.show()
    }
UI가 어떻게 보일지, 텍스트, 버튼 등 원하는 dialog를 직접만들 수 있다.
커스텀을 위해 xml 파일도 새로 마련했다.
<?xml version="1.0" encoding="utf-8"?>
<LinearLayout xmlns:android="http://schemas.android.com/apk/res/android"
    android:layout_width="match_parent"
    android:layout_height="match_parent"
    android:orientation="vertical"
    android:padding="10dp">

    <TextView
        android:layout_width="wrap_content"
        android:layout_height="wrap_content"
        android:text="Custom Dialog Title"
        android:textColor="@android:color/black"
        android:textSize="16sp" />

    <TextView
        android:layout_width="wrap_content"
        android:layout_height="wrap_content"
        android:layout_marginTop="10dp"
        android:text="Custom Dialog Content Details. Which you can set your own as per requirement."
        android:textColor="@android:color/darker_gray"
        android:textSize="14sp" />

    <LinearLayout
        android:layout_width="match_parent"
        android:layout_height="wrap_content"
        android:layout_marginTop="10dp"
        android:orientation="horizontal">

        <TextView
            android:id="@+id/tv_submit"
            android:layout_width="0dp"
            android:layout_height="match_parent"
            android:layout_weight="1"
            android:foreground="?attr/selectableItemBackground"
            android:gravity="center"
            android:padding="10dp"
            android:text="SUBMIT"
            android:textColor="@android:color/holo_red_dark"/>

        <TextView
            android:id="@+id/tv_cancel"
            android:layout_width="0dp"
            android:layout_height="match_parent"
            android:layout_weight="1"
            android:foreground="?attr/selectableItemBackground"
            android:gravity="center"
            android:padding="10dp"
            android:text="CANCEL"
            android:textColor="@android:color/black"/>

    </LinearLayout>
</LinearLayout>
마지막 dialog 는 커스텀 실행 바 다이얼로그이다.
Progress Wait... 이라고 텍스트가 뜨며 빙글빙글 돌아가는 애니메이션이 보인다.
백그라운드 프로세스를 실행할 때 아무것도 안일어나도록 만들어야 하기 위한 기능인데, 코드를 보자
            /**
             * Here we have handled onClick of Custom Progress Dialog Button.
             */
            val btnCustomProgress:Button = findViewById(R.id. btn_custom_progress_dialog)
            btnCustomProgress.setOnClickListener {

                //Launch Custom Progress Dialog
                customProgressDialogFunction()
            }


            ...


    /**
     * Method is used to show the Custom Progress Dialog.
     */
    private fun customProgressDialogFunction() {
        val customProgressDialog = Dialog(this)

        /*Set the screen content from a layout resource.
        The resource will be inflated, adding all top-level views to the screen.*/
        customProgressDialog.setContentView(R.layout.dialog_custom_progress)

        //Start the dialog and display it on screen.
        customProgressDialog.show()
    }
기본적으로 dialog 를 만든다.
레이아웃 파일을 직접 만들어야 하는데
xml 은 다음과 같다.
<?xml version="1.0" encoding="utf-8"?>
<LinearLayout xmlns:android="http://schemas.android.com/apk/res/android"
    android:layout_width="match_parent"
    android:layout_height="match_parent"
    android:gravity="center"
    android:orientation="horizontal"
    android:padding="10dp">

    <ProgressBar
        android:layout_width="50dp"
        android:layout_height="50dp"
        android:layout_marginEnd="10dp" />

    <TextView
        android:layout_width="wrap_content"
        android:layout_height="wrap_content"
        android:text="Please Wait..."
        android:textColor="@android:color/black"
        android:textSize="16sp" />

</LinearLayout>
진행률을 보고 싶다면 진행바 코드를 %로 지정해볼 수도 있겠다.
다양한 특성이 존재하므로 살펴볼 수 있다.
외부 저장장치 권한
갤러리 버튼을 눌렀을 때 외부 저장장치를 읽어서 갤러리에서 이미지를 가져오도록하자
 <uses-permission android:name="android.permission.READ_EXTERNAL_STORAGE" />
    <uses-permission android:name="android.permission.WRITE_EXTERNAL_STORAGE"
        android:maxSdkVersion="28" />
먼저 사용하려는 권한을 추가한다.
 private fun showRationaleDialog(
        title: String,
        message: String,
    ) {
        val builder: AlertDialog.Builder = AlertDialog.Builder(this)
        builder.setTitle(title)
            .setMessage(message)
            .setPositiveButton("Cancel") { dialog, _ ->
                dialog.dismiss()
            }
        builder.create().show()
    }
데모에서 만들었던 함수를 재사용한다.
activity launcher 를 설정하자.
val requestPermission: ActivityResultLauncher<Array<String>> =
        registerForActivityResult(ActivityResultContracts.RequestMultiplePermissions()) { permissions ->
            permissions.entries.forEach {
                val perMissionName = it.key
                val isGranted = it.value
                //if permission is granted show a toast and perform operation
                if (isGranted ) {
                    Toast.makeText(
                        this@MainActivity,
                        "Permission granted now you can read the storage files.",
                        Toast.LENGTH_LONG
                    ).show()

                    val pickIntent = Intent(Intent.ACTION_PICK,MediaStore.Images.Media.EXTERNAL_CONTENT_URI)
                    openGalleryLauncher.launch(pickIntent)
                } else {

                    if (perMissionName == Manifest.permission.READ_EXTERNAL_STORAGE)
                        Toast.makeText(
                            this@MainActivity,
                            "Oops you just denied the permission.",
                            Toast.LENGTH_LONG
                        ).show()
                }
            }

        }
permission 을 가져오려면 람다식이 필요하다.
entries.forEach 를 통해 반복문으로 각각의 권한을 전부 확인한다.
if 문으로 승인여부를 확인하고 토스트 메세지를 표시하자.
else 문으로는 권한이 없다는 것을 확인할 수 있다.
여기선 외부 저장소를 읽을 권한을 요청하는 것을 확인한다.
이제 requestPermission 변수를 onCreate 메소드에서 사용할 수 있다.
이걸 실행시키려면 두번째 이미지 버튼을 활성화 시켜야할거다.
 val ibGallery: ImageButton = findViewById(R.id.ib_gallery)
        //TODO(Step 10 : Adding an click event to image button for selecting the image from gallery.)

        ibGallery.setOnClickListener {
            requestStoragePermission()
        }
ib_gallery 로 setOnClickListener 도 만들어준다.
저장소 접근권한을 요청하는 기능을 가진건 따로 빼서 만들어보자.
//Todo 5: create a method to requestStorage permission
    private fun requestStoragePermission(){
        //Todo 6: Check if the permission was denied and show rationale
        if (
            ActivityCompat.shouldShowRequestPermissionRationale(
                this,
                Manifest.permission.READ_EXTERNAL_STORAGE)
        ){
            //Todo 9: call the rationale dialog to tell the user why they need to allow permission request
            showRationaleDialog("Kids Drawing App","Kids Drawing App " +
                    "needs to Access Your External Storage")
        }
        else {
            // You can directly ask for the permission.
            // Todo 7: if it has not been denied then request for permission
            //  The registered ActivityResultCallback gets the result of this request.
            requestPermission.launch(
                arrayOf(
                    Manifest.permission.READ_EXTERNAL_STORAGE,
                    Manifest.permission.WRITE_EXTERNAL_STORAGE
                )
            )
        }

    }
showRationaleDialog 를 불러와서 메세지로 저장소 접근 권한을 요청한다.
사용자에게 왜 이 기능을 액세스 해야하는지 설명하는 부분도 추가한다.
if 문으로 권한 요청을 확인하지 못했다면 else 문으로 넘어가서 권한을 요청한다.

갤러리에서 이미지 선택하여 백그라운드에 사용하기
val requestPermission: ActivityResultLauncher<Array<String>> =
        registerForActivityResult(ActivityResultContracts.RequestMultiplePermissions()) { permissions ->
            permissions.entries.forEach {
                val perMissionName = it.key
                val isGranted = it.value
                //if permission is granted show a toast and perform operation
                if (isGranted ) {
                    Toast.makeText(
                        this@MainActivity,
                        "Permission granted now you can read the storage files.",
                        Toast.LENGTH_LONG
                    ).show()
                    //perform operation
                    //Todo 1: create an intent to pick image from external storage
                    val pickIntent = Intent(Intent.ACTION_PICK,MediaStore.Images.Media.EXTERNAL_CONTENT_URI)
                    //Todo 6: using the intent launcher created above launch the pick intent
                    openGalleryLauncher.launch(pickIntent)
                } else {
                    //Displaying another toast if permission is not granted and this time focus on
                    //    Read external storage
                    if (perMissionName == Manifest.permission.READ_EXTERNAL_STORAGE)
                        Toast.makeText(
                            this@MainActivity,
                            "Oops you just denied the permission.",
                            Toast.LENGTH_LONG
                        ).show()
                }
            }

        }
if 문에서 갤러리 권한을 준걸 확인하고,
intent 를 이용해 갤러리로 이동한다.
MediaStore.Images.Media 로 작성하면 된다.
이미지를 선택할 수 있으려면 launcher 가 필요하다
 //Todo 2: create an activity result launcher to open an intent
    val openGalleryLauncher:ActivityResultLauncher<Intent> = registerForActivityResult(ActivityResultContracts.StartActivityForResult()){result->
        //Todo 3: get the returned result from the lambda and check the resultcode and the data returned
        if (result.resultCode == RESULT_OK && result.data != null){
            //process the data
            //Todo 4 if the data is not null reference the imageView from the layout
            val imageBackground:ImageView = findViewById(R.id.iv_background)
            //Todo 5: set the imageuri received
            imageBackground.setImageURI(result.data?.data)
        }
    }
result 가 가져온 데이터를 이미지 뷰에 대입한다.
activity_main.xml 에 보면 iv_background 에서 이미지를 사용하고 있다.
이걸 갤러리에서 선택한 이미지로 바꾼다.
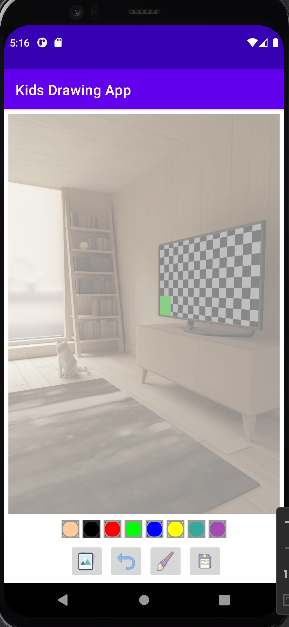
선택한 이미지가 배경으로 깔린 모습이다.
'GDSC HUFS 4기 > Kotlin Team #6' 카테고리의 다른 글
| [6팀]드로잉 앱("취소 버튼과 기능 추가하기"부터 "이메일, 왓츠앱 등으로 이미지를 공유하는 공유 기능"까지) (0) | 2022.11.20 |
|---|---|
| [6팀] 드로잉 앱 - 드로잉 뷰, 브러쉬, DisplayMatrix (0) | 2022.11.14 |
| [6팀] 드로잉 앱-캔버스 사용법,이미지 불러오고 내보내기 (0) | 2022.11.14 |
| [6팀] 계산기 - XML 사용법과 UI 생성법 배우기 (0) | 2022.10.31 |
| [6팀] 코틀린으로 분 단위 계산기 만들기 (1) | 2022.10.31 |