이 글은 유데미 강의 Android 12 및 Kotlin 개발 완전 정복을 참고하여 작성하였습니다.
작성자 : 문형근
개발환경은 Mac OS, Android Studio입니다.
1. 브러쉬 사이즈 선택하기
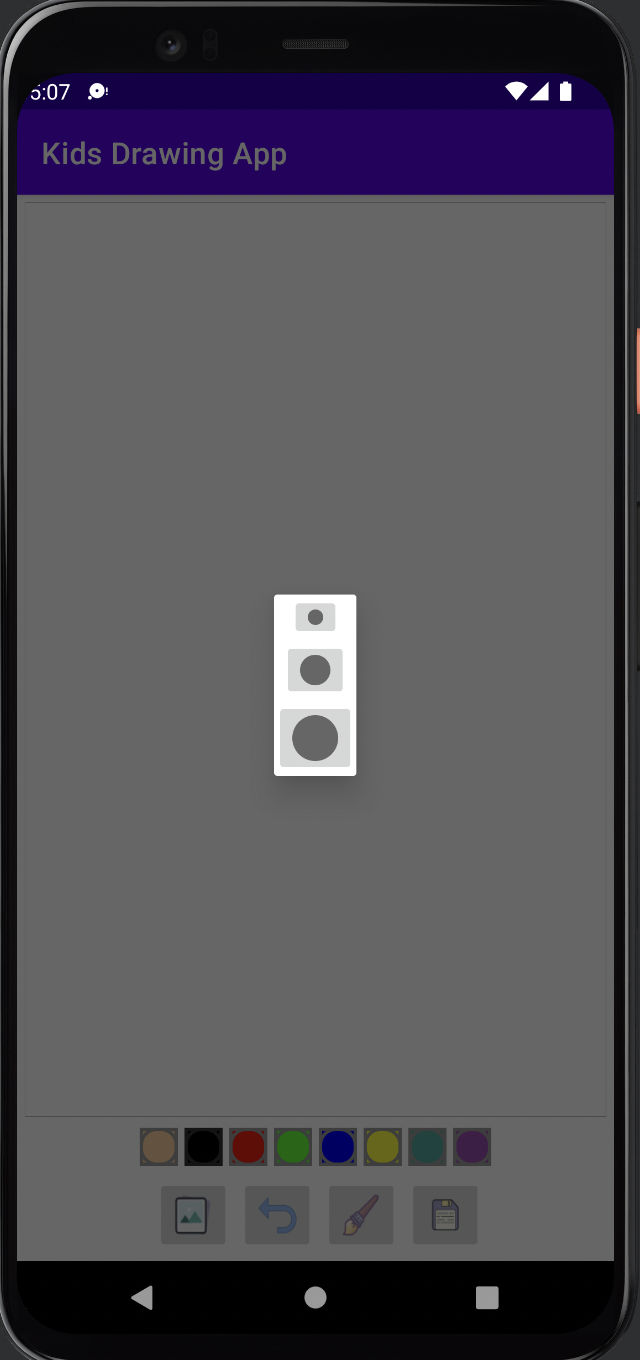
다음과 같이 붓의 두께를 설정할 수 있는 버튼을 추가한다.
//dialog_brush_size.xml

<ImageButton
    android:id="@+id/ib_small_brush"
    android:layout_width="wrap_content"
    android:layout_height="wrap_content"
    android:contentDescription="image"
    android:src="@drawable/small" //drawable resource 생성, 아래 코드 이어짐
    app:layout_constraintTop_toTopOf="parent"
    app:layout_constraintLeft_toLeftOf="parent"
    app:layout_constraintRight_toRightOf="parent"
    app:layout_constraintBottom_toTopOf="@+id/ib_medium_brush"/> //medium brush 위에 위치, medium brush 생성 필요
//small.xml(drawable resource)
<shape
xmlns:android="http://schemas.android.com/apk/res/android"
android:dither="true"
android:shape="oval" >
<size
android:height="10dp"
android:width="10dp" />
<solid android:color="#FF666666" /> //배경색 지정
</shape>- dither 속성은 비트맵이 화면과 동일한 픽셀 구성을 가지고 있지 않은 경우, 비트맵에 관한 디더링을 사용 설정(true)하거나 사용 중지(false)한다.
- dithering이란 제한된 색을 사용하여 여러 색을 최대한 근사하게 생성하기 위해 사용되는 기술이다.
** Drawable Resource, 디더링 참고
드로어블 리소스 | Android 개발자 | Android Developers
드로어블 리소스 컬렉션을 사용해 정리하기 내 환경설정을 기준으로 콘텐츠를 저장하고 분류하세요. 드로어블 리소스는 화면에 그릴 수 있으며 getDrawable(int)와 같은 API를 사용하여 가져오거나 a
developer.android.com
디더링 (Dithering)
디더링이란 무었인가?컴퓨터 그래픽스에서 제한된 색을 사용하여 여러 색을 최대한 근사하게 생성하기 위해 사용되는 기술.화상의 각 면을 다른 계조 색의 도트 집합으로 처리하는 기술에 의존
mgun.tistory.com
//MainActivity

private fun showBrushSizeChooserDialog() { //브러쉬 두께 설정의 팝업창 구성
    val brushDialog = Dialog(this)
    brushDialog.setContentView(R.layout.dialog_brush_size)
    brushDialog.setTitle("Brush size :")
    val smallBtn: ImageButton = brushDialog.findViewById(R.id.ib_small_brush)
    smallBtn.setOnClickListener(View.OnClickListener {
        drawingView?.setSizeForBrush(10.toFloat())
        brushDialog.dismiss()
    })
    val mediumBtn: ImageButton = brushDialog.findViewById(R.id.ib_medium_brush)
    mediumBtn.setOnClickListener(View.OnClickListener {
        drawingView?.setSizeForBrush(20.toFloat())
        brushDialog.dismiss()
    })

    val largeBtn: ImageButton = brushDialog.findViewById(R.id.ib_large_brush)
    largeBtn.setOnClickListener(View.OnClickListener {
        drawingView?.setSizeForBrush(30.toFloat())
        brushDialog.dismiss()
    })
    brushDialog.show()
}
- Dialog은 화면에 뜨는 선택 가능한 팝업창이다.
- 안드로이드는 Dialog 밖의 공간을 누르면 그 화면이 닫히도록 설정되어 있다.
- 'brushDialog.dissmiss()'가 그 버튼을 누르면 Dialog가 닫히게 해준다.
//activity_main.xml, drawing view 안에 버튼 구현

 <ImageButton
            android:id="@+id/ib_brush"
            android:layout_width="50dp"
            android:layout_height="50dp"
            android:layout_margin="5dp"
            android:contentDescription="image"
            android:scaleType="fitXY"
            android:src="@drawable/ic_brush" />
2. 색상 팔레트 추가하기
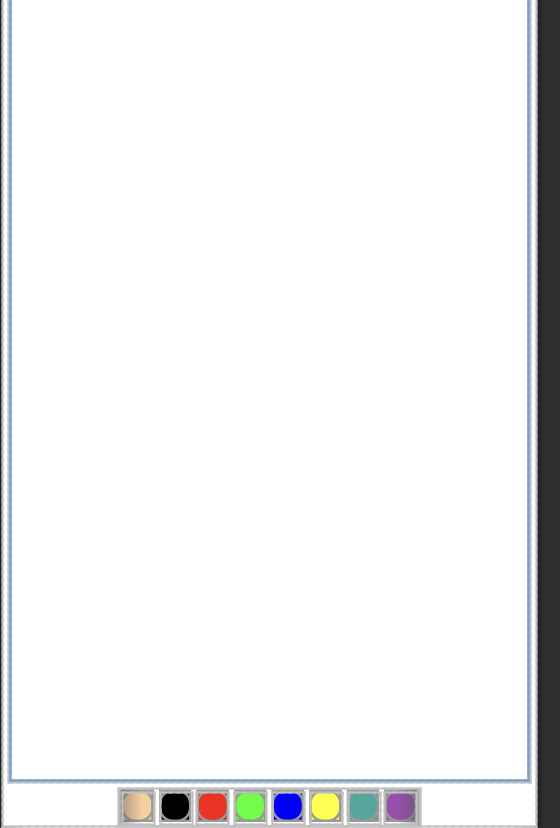
다음과 같이 색상을 선택하는 팔레트를 UI를 추가한다.
//activity_main.xml

<LinearLayout
    android:id="@+id/ll_paint_colors"
    android:layout_width="wrap_content"
    android:layout_height="wrap_content"
    android:orientation="horizontal"
    app:layout_constraintBottom_toTopOf="@id/ll_action_buttons"
    app:layout_constraintLeft_toLeftOf="parent"
    app:layout_constraintRight_toRightOf="parent"
    app:layout_constraintTop_toBottomOf="@id/fl_drawing_view_container">
// activity_main.xml, 색상 버튼 추가
<ImageButton
android:layout_width="25dp"
android:layout_height="25dp"
android:layout_margin="2dp"
android:background="@color/skin"
android:contentDescription="image"
android:onClick="paintClicked"
android:src="@drawable/pallet_normal" //pallete_noraml.xml 이미지 뷰 생성
android:tag="@color/skin" />3. 색상 선택 추가하기
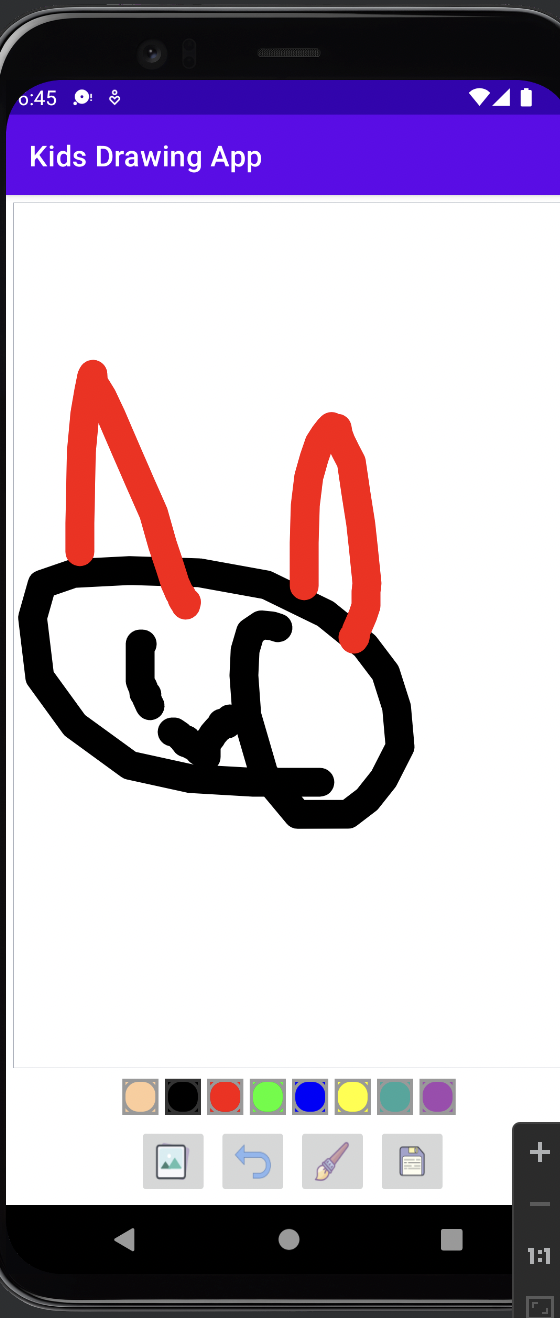
다음과 같이 팔레트에 색상을 선택하고 화면에 그릴 수 있게 기능을 추가한다.
fun setColor(newColor: String) {
    color = Color.parseColor(newColor)
    mDrawPaint!!.color = color
}
- mDrawPaint란 style과 color 정보를 포함하는 paint 클래스로 기하학 도형, 텍스트, 비트맵을 그릴 때 사용한다.
fun paintClicked(view: View) {
    if (view !== mImageButtonCurrentPaint) {
        val imageButton = view as ImageButton
        val colorTag = imageButton.tag.toString()
        drawingView?.setColor(colorTag)
        imageButton.setImageDrawable(ContextCompat.getDrawable(this, R.drawable.pallet_pressed))
        mImageButtonCurrentPaint?.setImageDrawable(
            ContextCompat.getDrawable(
                this,
                R.drawable.pallet_normal
            )
        )
        mImageButtonCurrentPaint = view
    }
}
4. 백그라운드 이미지 추가하기, 갤러리 이미지 버튼 추가하기
//activity_main.xml

<ImageView
    android:id="@+id/iv_background"
    android:layout_width="match_parent"
    android:layout_height="match_parent"
    android:contentDescription="image"
    android:scaleType="centerCrop" />
//activity_main.xml
<LinearLayout
android:id="@+id/ll_action_buttons"
android:layout_width="match_parent"
android:layout_height="wrap_content"
android:gravity="center"
android:orientation="horizontal"
app:layout_constraintBottom_toBottomOf="parent"
app:layout_constraintLeft_toLeftOf="parent"
app:layout_constraintRight_toRightOf="parent">
'GDSC HUFS 4기 > Kotlin Team #2' 카테고리의 다른 글
| [2팀] 드로잉 앱 만들기 (1) (0) | 2022.11.15 |
|---|---|
| [2팀] 퀴즈 앱 만들기(2) (0) | 2022.11.08 |
| [2팀] 코틀린으로 XML, UI를 생성해서 계산기 만들기 (0) | 2022.10.31 |
| [2팀] 코틀린으로 분 단위 계산기 만들기 (0) | 2022.10.26 |
| [2팀] 객체지향 프로그래밍 기초(2) (1) | 2022.10.13 |