이 글은 이것이 안드로이드다 with 코틀린(개정판)를 참고하여 작성하였습니다.
작성자 : 김민서
개발환경은 Windows, Android Studio입니다.

이번 강의에서는 서비스, 포어그라운드 서비스에 관하여 학습해보았다.
1. Service 특징, 생성하기
:화면이 없는 Activity
:백그라운드 작업을 위한 요소이며, 사용자에게 보여지는 Activity와 다르게 보여지지않는다.(뒤에서 수행됨)
:activity와 마찬가지로 메인 쓰레드에서 실행된다; 따라서 코드를 실행할때 activity 코드가 실행되고, 서비스가 실행된다.
(동시에 실행이안되고 순차적으로 실행된다)
이런 Service 코드를 작성해보자.
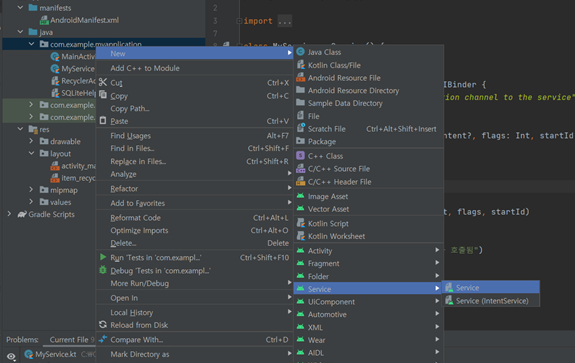
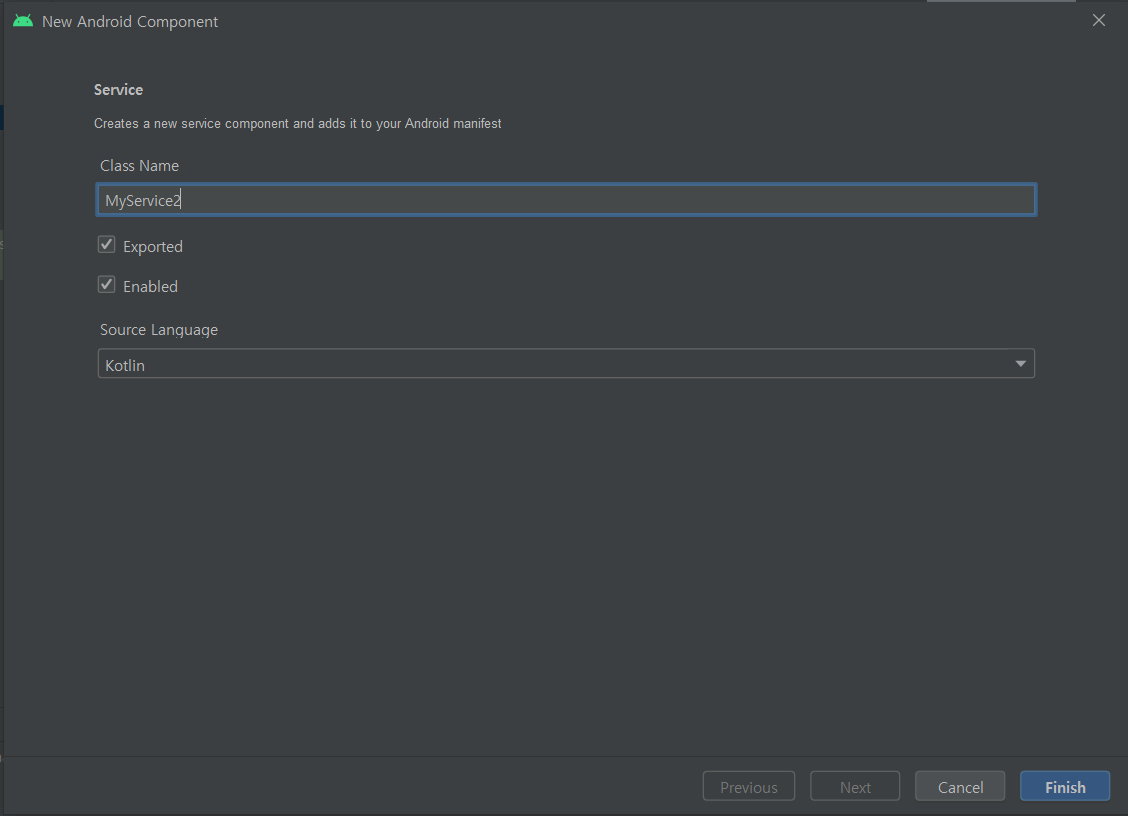
+exported 여부는 내 코드를 다른곳에서 사용할수있는지 여부이다.
(default로 설정되어잇는값으로 생성하면된다)
:activity와 같은 major 컴포넌트이다
따라서 manifest에 있는 xml파일을 보면 activity 처럼 태그가 작성되어있는 모습이다

2. Service 실행해보기
MyService.kt
package com.example.myapplication

import android.app.Service
import android.content.Intent
import android.os.IBinder
import android.util.Log

class MyService : Service() {
    companion object{
        val ACTION_CREATE ="create";
        val ACTION_DELETE ="delete";
    }
    override fun onBind(intent: Intent): IBinder {
        TODO("Return the Communication channel to the service")
    }

    override fun onStartCommand(intent: Intent?, flags: Int, startId: Int): Int {
        val action = intent?.action
        when(action){
            ACTION_CREATE -> create()
            ACTION_DELETE -> delete()
        }
        return super.onStartCommand(intent, flags, startId)
    }
    fun create(){
        Log.d("서비스","create()가 호출됨")
    }
    fun delete(){
        Log.d("서비스","delete()가 호출됨")
    }
}
onStartCommand 함수, action
앞서 activity내용중, A activity에서 B activity로 실행할때 intent라는 변수를 이용하여서 데이터를 전달해주었다
마찬가지로 서비스를 실행할때 intent를 인자로 받고, action이라는 속성을 사용해서 변수를 선언해줌
(remind : 앞서 activity에서는 intent의 put이라는 속성을 주로사용했었음)
MainActivity.kt
package com.example.myapplication

import android.content.Intent
import androidx.appcompat.app.AppCompatActivity
import android.os.Bundle
import android.view.View
import androidx.recyclerview.widget.LinearLayoutManager

class MainActivity : AppCompatActivity() {
    override fun onCreate(savedInstanceState: Bundle?) {
        super.onCreate(savedInstanceState)
        setContentView(R.layout.activity_main)

    }
    fun serviceStart(view:View){
        val intent = Intent(this,MyService::class.java)
        intent.action = MyService.ACTION_CREATE
        startSerivce(intent)
    }
    fun serviceStop(view:View){
        val intent = Intent(this,MyService::class.java)
        stopSerivce(intent)
    }
}
}
: startService,stopService 함수는 이미 만들어져있는 함수; 해당함수로 Intent 파라미터로 있는서비스를 호출
activity_main.xml
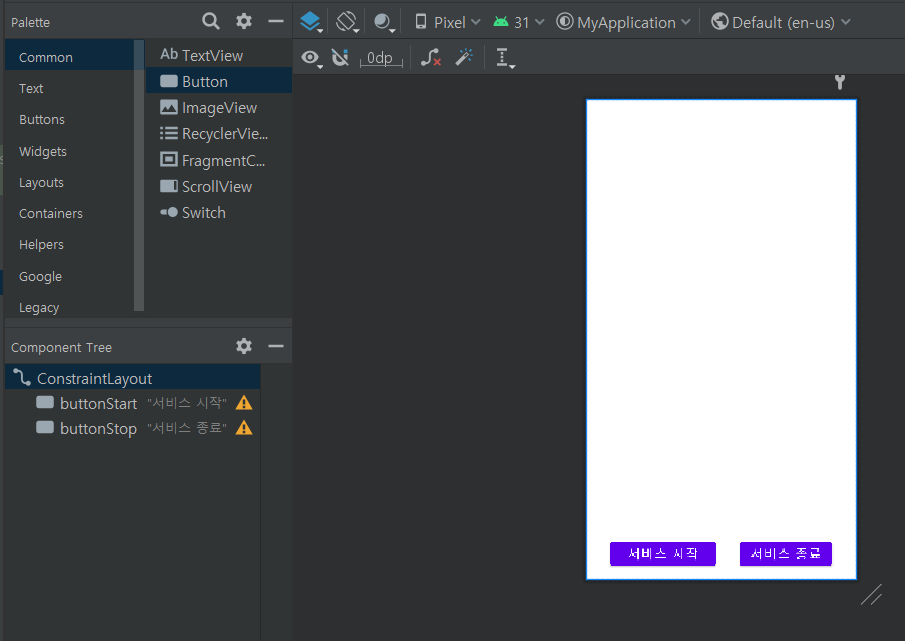
먼저 위와 같이 버튼 두개를 만들어주고 앞서 만들어준 serviceStart, serviceStop 함수를 연결시켜주자.
보통 버튼과 함수를 연결시킬때 setOnClikListner 함수를 호출해주시는식으로 코딩해주는데,
해당 강의에서는 코드를 줄이기위해 파라미터를 view:View로 넣어주고
xml파일에서 바로 적용시키는 방법을 설명해주셨다
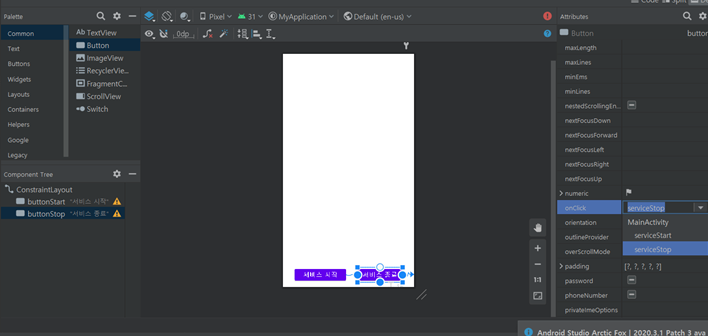
위와 같이 button의 attribute중 onClick이 있다. 이를 클릭하면 onClick을 적용할수있는 함수들이 나오는데 이를 맞게 선택해주면 끝이다!
위를 실행해주면 아래와 같이 각각의 버튼을 클릭했을때 log가 뜬다.
+lateInit을 사용해줘서 intent를 선언해주면 코드를 줄일수있다.
package com.example.myapplication

import android.content.Intent
import android.content.Intent.ACTION_DELETE
import androidx.appcompat.app.AppCompatActivity
import android.os.Bundle
import android.view.View
import androidx.recyclerview.widget.LinearLayoutManager

class MainActivity : AppCompatActivity() {
	//lateinit 사용
    private lateinit var serviceIntent: Intent
    override fun onCreate(savedInstanceState: Bundle?) {
        super.onCreate(savedInstanceState)
        setContentView(R.layout.activity_main)
        serviceIntent= Intent(this,MyService::class.java)

    }
    fun serviceStart(view:View){
    	//앞서 선언해준 serviceIntent 쓰기
        serviceIntent.action = MyService.ACTION_CREATE
        startService(serviceIntent)
    }
    fun serviceStop(view:View){
        stopService(serviceIntent)
    }
}
3. 바인드 서비스 만들기
마찬가지로 serviceBind, serviceUnbind 함수를 만들어준다
serviceBind 함수
val isService = false // 서비스의 연결여부를 알려주는 변수
val connection = object : ServiceConnection{
 		override fun onServiceConnected(p0: ComponentName?, iBinder: IBinder) {
            isService = true
            //연결되순간 binder를 호출해줌
            //binder에서는 서비스 자체를 리턴해주니까
            val binder = service as MyService.MyBinder
            myService = iBinder.getService()
        }
        //알수없이 연결이 끊겼을때
        override fun onServiceDisconnected(p0: ComponentName?) {


        }
    }

fun serviceBind(view: View){
        bindService(intent,connection, Context.BIND_AUTO_CREATE)
    }
bindService의 파라미터로는 intent,serviceConnection, flag 이렇게 3가지 들어간다
Context.BIND_AUTO_CREATE 에서 BIND_AUTO_CREATE는 서비스가 있다면 생성해주고, 없다면 있는거에 바인딩을 해줌
4. foreground Service
: 서비스가 백그라운드에서 오랫동안 실행되면 사용자는 실행여부를 모르고 배터리는 그만큼 소모되므로,
같이 사용해주어야함
:장시간 서비스를 이용할경우 꼭 foreground를 이용해주자
이번강좌에서는 foreground service로 notification을 띄워주는 실습을 진행함
fun createNotificationChannel
:해당 함수를 이용하여, notification을 만들어주자
- 여기서 NotificationChannel이라는 함수를 이용하는데, 파라미터로 id, 이름, 중요도(중요도가 높을수록 소리나 팝업, 진동여부를 조정함)를 입력해주어야함
- channel을 사용하겠다고 알려주는 역할의 변수가 필요함; manager
<- getSystemService 함수를 사용
- 해당함수의 인자로 1번에서 만들어준 notification을 넣어주자
fun onStartCommand
- 해당 함수에서 createNotificationChannel 을 호출해서 어떤 채널을 사용할지 알려준다
- 띄울 notification을 NotificationCompat.Builder로 만들어준다
- 옵션 설정: 제목, 아이콘, 알림의 강도(소리만, 진동,등등..중요도에 따라 설정)등을 설정해준다
이를 main에서 사용해주자
앞서 서비스와 비슷하게 serviceStart, serviceStop함수를 작성해주자
start함수에서는 ContextCompat.startForegroundService를 사용했고
stop에서는 그냥 stopService함수를 사용했다.
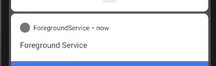
이를 앞선 service 실습예제 처럼 버튼의 속성인 onClick에 해당함수를 넣어주고 실행해보면, 아래와 같이 알림창에 notification이 출력된다.
[전체코드;ForegroundService.kt]
package com.example.myapplication

import android.app.NotificationChannel
import android.app.NotificationManager
import android.app.Service
import android.content.Intent
import android.os.Build
import android.os.IBinder
import android.util.Log
import androidx.core.app.NotificationCompat

class ForegroundService : Service() {
    val CHANNEL_ID = "FGS153"
    val NOTI_ID = 99
    fun createNotificationChannel(){
        if(Build.VERSION.SDK_INT >= Build.VERSION_CODES.O){
            val serviceChannel = NotificationChannel(CHANNEL_ID,"FOREGROUND",NotificationManager.IMPORTANCE_DEFAULT)
            val manager = getSystemServiceName(NotificationManager::class.java)
            manager.createNotificationChannel(serviceChannel)
        }
    }

    override fun onStartCommand(intent: Intent?, flags: Int, startId: Int): Int {
        createNotificationChannel()
        val notification = NotificationCompat.Builder(this,CHANNEL_ID)
            .setContentTitle("Foreground Service")
            .setSmallIcon(R.mipmap.ic_launcher_round)
            .build()
        startForeground(NOTI_ID,notification)
        return super.onStartCommand(intent, flags, startId)
    }

    fun runBackGround(){
        for(i in 0..100){
            Thread.sleep(1000)
            Log.d("서비스","Count==>$i")
        }
    }
    override fun onBind(intent: Intent): IBinder {
        TODO("Return the communication channel to the service.")
    }
}
'GDSC HUFS 3기 > Android with Kotlin Team 2' 카테고리의 다른 글
| [2팀] 35 Android 구글 맵 사용하기 (0) | 2021.12.07 |
|---|---|
| [2팀] 34 Android AsyncTask의 구조와 제작 사항 (0) | 2021.12.06 |
| [2팀] 33 Android 뮤직 플레이어 만들기 (0) | 2021.11.29 |
| [2팀]쓰레드 타이머, 코루틴 이미지 다운로드 (0) | 2021.11.29 |
| [2팀]16 Android와 SQLite 데이터 베이스 (0) | 2021.11.25 |